The Art of Contouring: A Guide to Sculpting Your Face
Contouring is a popular makeup technique that involves using shadows and highlights to create the illusion of defined cheekbones, a slimmer nose, and a more chiseled jawline. It's a great way to enhance your natural features and give your face a more structured, sculpted look. In this blog post, we'll show you how to contour like a pro and achieve a stunning, camera-ready look.
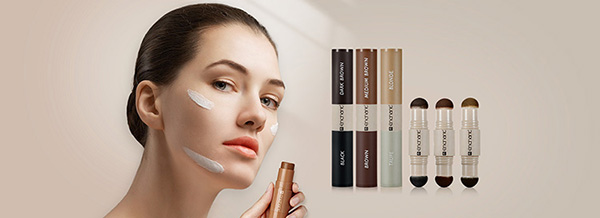
Choosing the Right Contour Shades
Before we dive into the steps of contouring, it's important to choose the right shades for your skin tone. The key is to select shades that are one to two shades deeper than your natural skin color. You can use a bronzer, a contour powder, or even a foundation that's slightly darker than your usual shade.
If you have fair skin, look for shades that are warm and golden. If you have medium to tan skin, look for shades that are rich and deep. And if you have dark skin, look for shades that are cool and ashen.
Step 1: Prepare Your Skin
Before you start contouring, make sure your skin is clean and moisturized. Apply a lightweight foundation or tinted moisturizer to even out your complexion. Let it set for a few minutes before moving on to the next step.
Step 2: Identify Your Features
To contour effectively, you need to identify the areas of your face where you want to create shadow and definition. Look for the hollows of your cheeks, the sides of your nose, and the jawline. These areas will serve as your guide for applying contour.
Step 3: Apply Contour
Using a makeup brush or a contour tool, apply the contour shade along the hollows of your cheeks, starting from the hairline and blending down towards the apple of your cheek. Use gentle, sweeping motions to ensure a seamless blend. Repeat the same process on the other side of your face.
Next, apply the contour shade along the sides of your nose, starting from the tip and working your way up towards the bridge. Blend well to avoid harsh lines.
Finally, apply the contour shade along the jawline, starting from the earlobe and working your way down towards the chin. Blend the edges well to create a defined, clean line.
Step 4: Add Highlights
Highlights are an essential part of contouring, as they help to create contrast and dimension on the face. Using a highlighter that's one shade lighter than your natural skin color, apply a thin layer along the high points of your face, such as the tops of your cheekbones, the cupid's bow, the brow bone, and the center of your chin.
Blend the highlighter well to avoid streaks or patches. You can also add a subtle highlight to the inner corners of your eyes and the brow bone to brighten up your face.
Step 5: Blend, Blend, Blend
Blending is crucial in contouring, as it helps to create a natural, effortless look. Use a fluffy brush or a blending brush to soften the edges of the contour shade, making sure there are no harsh lines or transitions.
You can also use a setting powder to set the contour in place and prevent it from looking cakey or heavy. Tap off any excess powder and buff the area gently to ensure a smooth finish.
And That's It!
With these simple steps, you can create a beautiful, sculpted look that enhances your natural features. Remember to practice regularly to find the right shades and techniques that work best for your skin tone and face shape. Happy contouring!
